There are many ways to start an architectural project. The approach will depend on each designer’s preference and at which design stage you are beginning your project in Revit.
Approach 1: Starting with a layout
Most architectural projects begin by designing space layouts using lines or basic modeling tools such as walls, doors and windows. Once a layout is complete at one level, often the design develops vertically on different levels.
Approach 2: Starting with a reference
Some architects like to begin their conceptual work in CAD, SketchUp or other software tools. Once a concept is finalized, a REVIT model is then generated using the output drawings from CAD/other tools as references.
Approach 3: Using complex forms for conceptual design
Some architects like to begin their design by playing with space volumes and complex forms. Once the form is finalised, a building model is then generated based on that form. In REVIT, this is done through Massing tools. It is especially useful for complex form development during conceptual planning phase.
Please note that as this course ‘Basic 3D Modeling tools for an Architectural project‘ is focused on beginner level, the tutorials provided in this course are based on approach 1 and 2. If you are interested in learning more about approach 3, click on Massing Studies.
Q&A
Have any Questions? or Suggestions? or Feedback? Please feel free to Contact Us, we will get back to you as soon as we can.
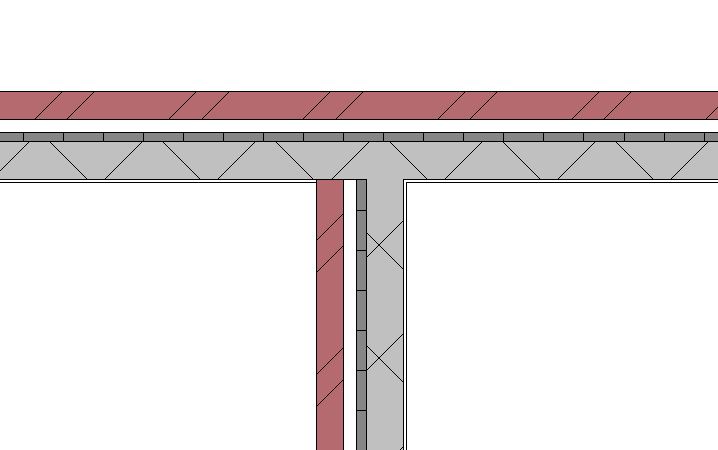
System families, such as walls, floors, ceilings, and roofs, are compound structures. That means that they are comprised of a series of layers, with each layer defined by its function, material, and thickness. Some of the family types are simply defined by one layer.
Adding compound layers to the Wall
If you would like to add different layers in a wall type, such as finishes, plaster, cladding, air barrier or multiple core layers such as bricks, concrete, stone, etc; you can do this by editing the compound structure of the wall.
Each layer in the compound structure has a function which define how two compound structure elements would join with each other.
Compound wall layers can wrap at the ends or at openings. This is particularly useful where finishing layers need to be wrapped at the walls with end cap or at openings.
Sometimes, walls not only have compounded layers in its thickness, but also vertically in their sections. Learn how to create vertically compound walls using this Video Tutorial – by Autodesk.
Compound wall layers can wrap at the ends or at openings. This is particularly useful where finishing layers need to be wrapped at the walls with end cap or at openings.
Vertically compound walls can host sweeps and reveals – which adds and cuts a profile on the wall respectively. This is useful when adding details such as parapet block, cornice, molding or a cutout to the wall.