Project files in Revit have “.RVT” extensions. To create a RVT file, you may either choose to use an existing project template (RTE) file or start a project with no template file. Template files have pre-defined settings which assist the project to get started faster. For example, project units are predefined, basic families commonly used are pre loaded, materials are preset, etc. If you choose not to use any templates, you will have to start your project by defining all settings and load your required library elements. If you are a beginner, it is recommended that you choose a default template file that is provided along with your software library.
1. Create a new project file with a template
- Open Revit software.
- Click on New under the projects (OR go to File Tab -> New -> Projects) and choose an ‘Architectural Template’ from the default list. (You can use any other template of your choice as well, if required.)
(Note: If you do not see a list of templates, click on Browse and go to the Program Data folder on the drive where Revit is installed. For example: C:\ProgramData\Autodesk\RVT 2019\Templates OR Alternatively, check the Autodesk folder under your User profile in the computer %ALLUSERSPROFILE%\Autodesk\RVT 2019\Templates)

2. Set up Project Units
Now, once your project file is open, next step would be to set up project units.
- Go to Manage tab on the Ribbon -> Setting Panel -> Project Units
- In the Project Units dialog box, Under discipline -> select Common
- Change the Length units to the unit of your choice(Ex: Meters)
- Select required Rounding values (Ex: 1 decimal place) and Unit symbols to be displayed (Ex: m)

- Click OK for Format dialog box.
- Click OK for the Project Units dialog box.
- Units for the length has been successfully changed.
(For further practice: Change the Area, Volume and Angle units to Square Meters, Cubic Meters and Decimal Degrees respectively)
- Learn more about Setting Up project units with the Video Tutorial by Autodesk
3. Update Project Information
After setting up project units, add some project information to your project.
- Go to Manage tab on the Ribbon -> Setting Panel -> Project Information
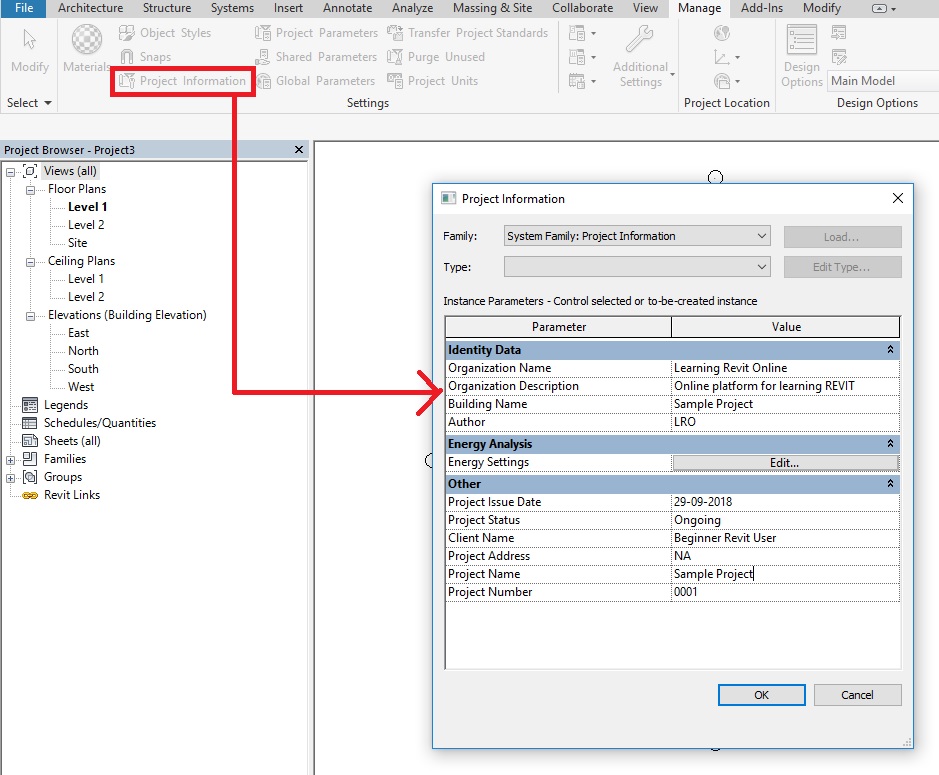
- Project Information dialog box will appear. Add the details about your project in this dialog box such as Project name, Client name, Project Address, etc.
- Click OK when you are finished adding required information. If you do not know some of the information at this stage, it is okay. You can come back to this dialog box later and add information when you have it with you.
4. Specify Geographic Location for your project
To set your project to a real world site location,
- Click Manage tab -> Project Location panel -> Location
- On the Location Weather and Site dialog box, under Define location by -> choose default city list.
- Alternatively, you can choose to find the location by choosing Internet mapping service in the same drop down menu.

- Alternatively, you can choose to find the location by choosing Internet mapping service in the same drop down menu.
- Under City, choose the city your project is located at.
- If you do not find the city in the default list, you can also enter the Latitude and Longitude of the exact project site location.
- Click OK to the location and weather site dialog box.
5. Set up the North orientation
Learn about setting up the North Orientation for your project with this Video Tutorial – by Autodesk Building Solutions
6. Save the project file
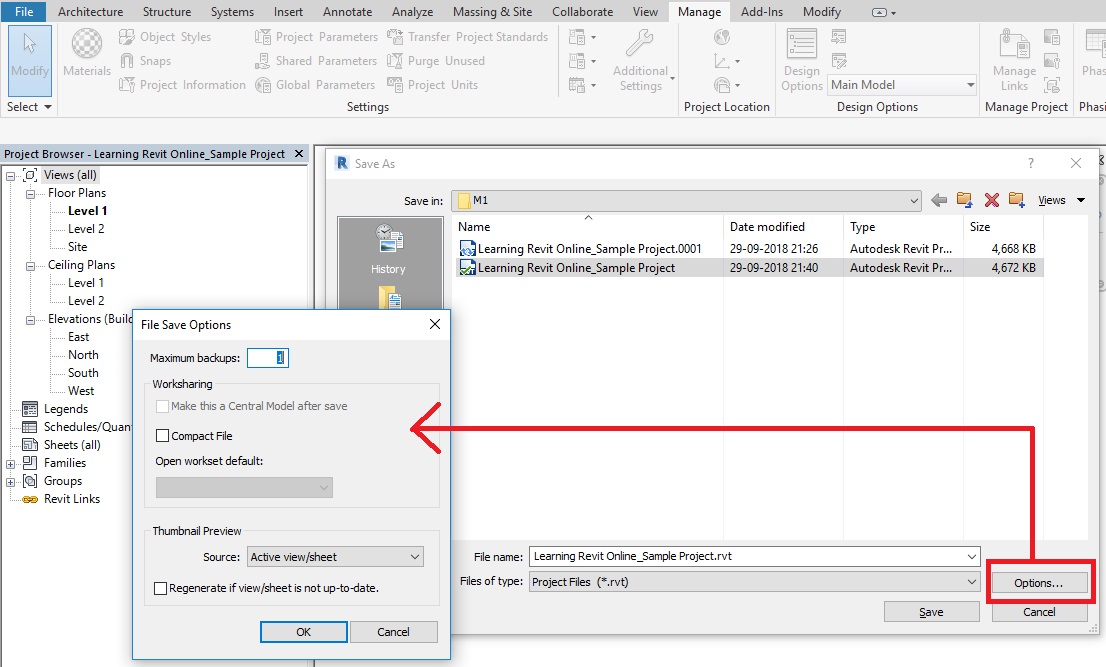
- Go to File Tab -> Save
- Give file name and Choose the file type as *.RVT (Ex: Learning Revit Online_Sample Project.rvt)
- Click Options -> File Save Options dialog box will appear -> Choose the maximum number of backups you would like to have for this file.
- Every time you will save, a previous version of the file would be saved as a backup till the maximum number of backups specified here is reached. After that, it will keep removing the oldest revisions and add a newer version of the backup file. Each backup file will get a suffix of “000n”(n=number of the backup version) with the project name. (Ex: Learning Revit Online_Sample Project.0001.rvt)
- Every time you will save, a previous version of the file would be saved as a backup till the maximum number of backups specified here is reached. After that, it will keep removing the oldest revisions and add a newer version of the backup file. Each backup file will get a suffix of “000n”(n=number of the backup version) with the project name. (Ex: Learning Revit Online_Sample Project.0001.rvt)
- Click Save. Now, you have successfully created a Revit project file.
- To know more about File Save Options, click here.
Q&A
Have any Questions? or Suggestions? or Feedback? Please feel free to Contact Us, we will get back to you as soon as we can.
